Thursday, 26 April 2012

Wednesday 18th April was the night we had all been waiting for…


The launch of our brand new vintage party planning service “An Era of Experience”. I’ve been teasing you all with little snippets about An Era of Experience over the last few months so now finally, I cannot wait to put my words into pretty pictures and let you all in on our secret.

Last Wednesday we invited 5 key bloggers and publications to our official launch of An Era of Experience. I’m quite new to this whole rubbing shoulders with the press/bloggers business! However I have to say, all of the ladies and one gent that attended An Era of Experience press launch were so lovely.

There was no dress rehearsal or practice runs, this was it, this was showtime! Despite the last minute hiccups of emergency lighting, extension lead and haven’t-a-clue-how-to-work-a-projector-screen, the event went so well that it ended up feeling like a social with friends rather than a scary press review!


The preparation for the event was intense. Bethany kindly gave us all a vintage makeovers at her home salon to ensure we all flirted a finger-wave! We all arrived at And The Dish Ran Away with the Spoon in our beautiful vintage gowns and sensible flat shoes with bags and bags of accessories to dress the room. We set to work at 4:00pm, munching on fish n chips as we worked. It must have looked pretty peculiar to anyone looking in! HaHa!


At 6:59pm we slipped into our heels and took a minute to breathe. Our evening began with press arriving at promptly as instructed at 7:00pm. 


For The Love of Vintage took orders straightaway for her signature teapot cocktails while And the Dish Ran Away with the Spoon talked everyone through her Speakeasy inspired food menu.


Once everyone had had a tipple and a nibble, I gathered everyone around my table of trinkets and trims and started my Flapper headdress workshop. I tried to incorporate the deep purple and antique gold colour ways used in our artwork into my fabric and embellishment selection. I always think it is important to continue a theme where possible and found these colours really worked for the flapper style headwear.


Here are a couple of sample 20’s headdresses I had brought along for inspiration.


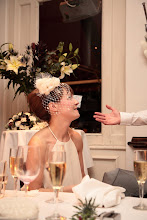
While the rest of the group took part in the workshop, each lady received special pampering treatment from The Vintage Beauty Parlour. Bethany and her assistant worked on hair and make-up at the same time, drawing long pencil thin brows and creating pretty pin curls on each of the ladies.


It was really nice to host such an intimate event to take the time to get to know each blogger and journalist properly. I really enjoyed offering guidance to the ladies designing their headpieces and was so pleased that everyone had a finished souvenir to take away!


So around 10:00pm our guests left with a little pot of red velvet cake baked by And the Dish Ran Away With the Spoon to remember An Era of Experience by. I really doubt they decided to share it, it looked way too yummy!


Us ladies celebrated with a well-deserved glass of Prosecco and toasted the success of a truly fabulous evening!

Well done everyone!

With special thanks to the ever wonderful Katy Lunsford for capturing us all on camera, Laura Coleman for providing the beautiful floral blooms and to Didsbury Life for photographing and blogging about An Era of Experience.

Of course not forgetting my fabulous four!

Bethany Jane Davies
And the Dish Ran Away with the Spoon
For The Love of Vintage
The Social Butterfly Events & PR


If you would like to know a little bit more about An Era of Experience or to book our services please email Rachael Adams at thesocialbutterfly.uk@gmail.com

X X X


PS Don't for get to LIKE our brand new Facebook page: http://www.facebook.com/pages/An-Era-of-Experience-Vintage-Hen-Parties/439792129367831

Tuesday, 27 March 2012

Meet The Designer - Silver Sixpence takes to the stage at The White Closet

Last Wednesday was my “Meet the Designer” event at exclusive bridal boutique The White Closet. From reading my blog and my newsletters you all will have probably gathered I’m quite a chatterbox! Therefore you’ll be surprised to know that in the run up to the event the thought of standing up and sharing my story to all you lovely brides sent my knees knocking! Let’s just say I’m a much better sewer than I am speaker, in public anyway!

I just wanted to say a huge thank you to The White Closet, my PR lady Rachael Adams, Vanilla in All Seasons catering, Jonny Draper Photographer, Zoe Chiotis (musician) and Didsbury Life. I also wanted to say an even bigger thank you all of the vintage loving brides that made it to the event! Hopefully you all went away with some amazing inspiration and treated yourself to that special something for your big day.


If you were lucky enough to squeeze into The White Closet last Wednesday you will have seen the latest editions to my Silver Sixpence collection. In the lead up to the event I was sewing til I had thread coming out of my ears and was dreaming of lace, feathers and pearls almost every night, but Oh how it was worth it! The brand new Celine full face birdcage veil was received really well by brides to be as was the Florrie boho headband and Persephone forehead birdcage veil. I absolutely love working with local brides and helping to create really special, bespoke pieces for them. It was nice to know that many of my brides had also purchased their dress from The White Closet. It makes me feel very proud to know my designs will be used to accessorize such amazing, luxury bridal wear. All of the latest editions to my collection will be appearing on my Etsy shop very soon so do keep checking back. http://www.etsy.com/shop/nicolawellard


I’m hoping to host another “Meet the Designer” event at The White Closet in the Autumn season to launch my Silver Sixpence in her Shoe third collection. Please keep visiting my website for further details. http://www.silver-sixpence-in-her-shoe.co.uk


Saturday, 10 March 2012

Silver Sixpence “Made By You” Home Kits: The 10 Step How to Guide in creating your vintage inspired headpiece at home

Inside your pretty 1920s "Clara" or 1950's "Betty" pot:

  • Sinamay round base
  • Crocodile clip
  • Selection of vintage fabrics
  • Russian Veiling
  • Jewels
  • Buttons
  • Feathers
  • Needle & Thread
  • Little note from me

In addition you will need:

  • Scissors
  • Fabric glue (optional)
  • An stitch un-picker, just in case!

My “Made By You” home kits cater for all levels of sewers. From those of you who learnt your tips and tricks from your Nanas, to those of you who experience utter frustration when trying to thread a needle, we’ve all been there! Each pretty pot is individually made using an array of vintage fabrics in different colour ways and textures. Each home-kit also contains a selection of hand-picked gems that you can use to glam up your head piece.

Step 1

Pop open your pot.

Step 2

Arrange your pretty pieces and think about what you are looking to create.


*Secret Tip*

The key to making your headpiece look really professional is to layer your fabrics on top of one another. To hide any stitching, make sure you sew as tightly as possible, knot off your threads and trim any loose ends.

Step 3

Position your croc clip on the back of the sinamay base and sew securely as demonstrated below from back to front of the base. This is so all stitching will be hidden on the inside. Knot securely.


Step 4

Decorating your design! Here are a few suggestions to inspire you.

You can bow or gather your Russian veiling as shown! This is a really simple but really effective idea to add height to your headpiece


Step 5

To make a cute bow from your pre-cut fabrics, fold inwards, pinch in the middle and secure by sewing. Easy peasy!


Step 6

If your kit contains a spikey goose feather, try curling it into circular shape as demonstrated in the picture below. Wrap with a piece of thread at the base and knot tightly to secure.


Step 7

Another interesting way to play with feathers is to layer them on top of each other to create texture.

Step 8

Take your pre-made bow and play about with positioning it on your base. I find they always look best when arranged at an angle or at least off-centre


Step 9

Button/Jewels/Gems – all the really gorgeous bits for you magpies out there!

The next few images show a variation on how to use your embellishments. Use them to make the headpiece really personal to you!


*Secret Tip*

If your kit contains any old vintage earrings with the backs removed, you will need to sew through the holes on the back of these as shown.

Step 10

Finishing touches

When decorating your headpiece with tiny beads or sequins be really careful when using fabric glue. A good tip is to try using an ear bud to apply the glue.


Finally...

Apply your favourite lipstick, style your hair and start wearing your “Made By You” headpiece! Don’t forget to post me a pic on my facebook page, can’t wait to see what you’ve all created!

http://www.facebook.com/pages/silver-sixpence-in-her-shoe/243610077016


Please be aware your "Made By You" kit is unique, no 2 are the same so your pot may not contain all of the above materials. I assure you whatever it contains will be beautiful!

This lovely photography is by the wonderful Katy Lunsford.

See more of Katy's work here - http://www.katylunsford.com/